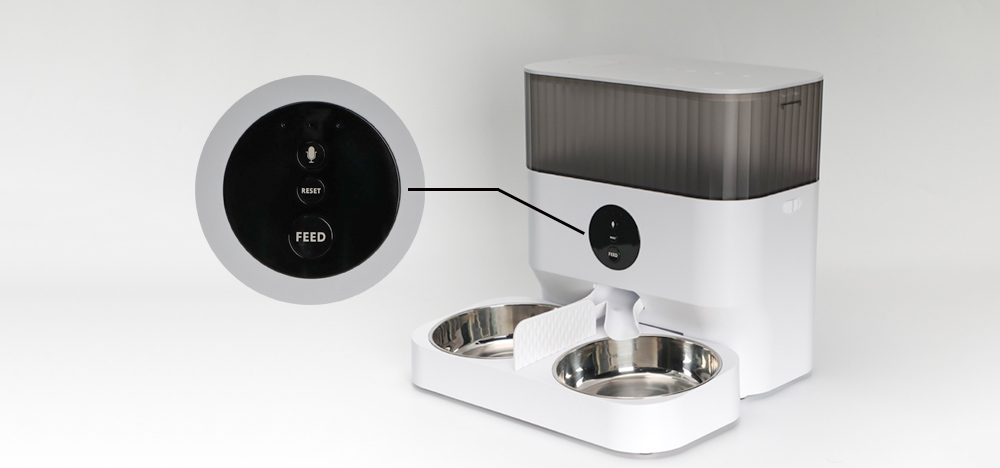
1. Installation timed food dispenser
Remove the interactive dog feeder from the box. Place the interactive dog feeder in the suitable location. Combine the food tray with the base of the feeder.
2. Connect the power supply
Plug the 5V/1A power adapter into the wall socket and connect the timed food dispenser. The bottom of the equipment is a rocker switch, which can cut off or open the power supply. Open the battery compartment at the bottom of the feeder and install 3 pcs Size D Battery ( not necessary) to prevent power failure. The LED light is no to indicate that the feeder is powered on. Note: does not including battery. Before turning on the power, make sure that all parts are clean and completely dry.
3. Put pet food in the interactive dog feeder food tank
Fill the food tank with dry pet food. To close the lid, press and hold the lid open button, align the side clips, and release the lid lid button to secure the food bucket and lid together. Note: do not place canned, wet or wet pet food. The recommended pet food size range is 3 to 13 mm.

4. Recording
Press and hold for 1 second to start recording with a beep, when hear two beeps to end recording. The timed food dispenser only support up to 10 seconds recording. Delete recording: long press for 1 second to make a beep, release the recording button for 1 second, and end the recording when you hear two beeps. ( In fact, a short period of blank recording is to replace recording) Note: it will play only when it is pressed when there is a recording. When the feeding time it will play the recording twice.
5. Feeding
Manual feeding: short press to serve 1 portion, and will play the recording 2 times at the same time. Note: The feeding plan will not be affected.
6. Reset timed food dispenser
Press and hold for 7 seconds to make a “ ding dong”sound, and the timed food dispenser will automatically restart after restoring the factory settings.


