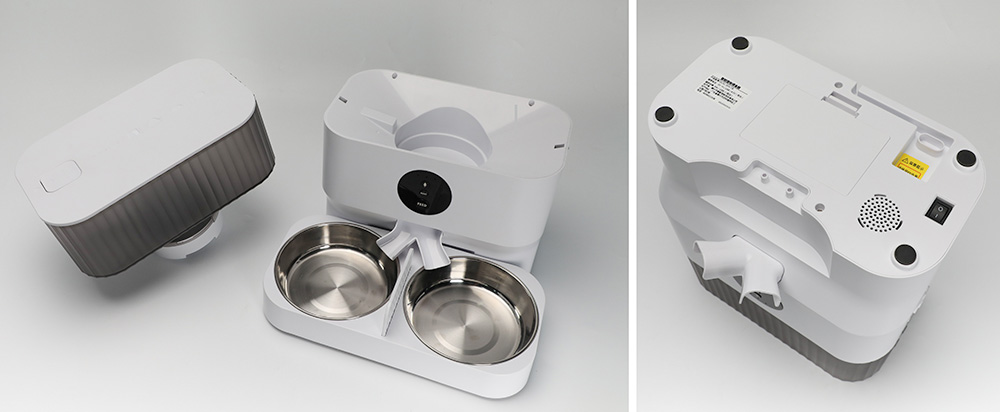
Like pet water fountains, auto pet feeder should be cleaned every once in a while. By cleaning the pet smart feeder, we can not only ensure that pets are fed in a clean environment, but also extend the life of the feeder. Different brands and different models have different cleaning steps. Today, we are going to explain the cleaning tutorial of universal auto pet feeder. Of course, before cleaning, we should carefully read the user manual of the product. Or product assemble videos. This will help to understand the structure of the product and facilitate our cleaning of the feeder.
Auto pet feeder cleaning steps:
Step 1: Disassemble the auto pet feeder. Turn off the power of the product. Remove the battery at the bottom. Most pet feeders have a backup power supply. It is usually powered by dry batteries. So take out the battery before cleaning. Then open the auto pet feeder dry box and remove the desiccant inside. To keep the pet food dry. The pet feeder is equipped with desiccant. Unlock the buttons on both sides to separate the food storage bin from the machine body. Unlock the button inside the machine body to remove the rotating blades. Finally, remove the stainless steel feeding bowl from the feeder. This completes the disassembly of the auto pet feeder.

Step 2: Clean the automatic pet dispenser. First of all, dispose of the residual pet food in the food storage bucket. The food storage bucket, stainless steel bowl and rotating blade removed in the first step can be soaked in soapy water. A soft sponge or brush can be used for cleaning. The body of the automatic pet dispenser cannot be cleaned with water. This is because it contains electronic components that can be damaged if cleaned with water. The main body of the machine can be cleaned with a damp cloth.
Step 3: Sterilize and dry the automatic pet dispenser parts. After cleaning the parts, we can also use disinfectant to clean the parts, which will make the feeder more clean and hygienic. At the same time, use paper towels or clean towels to dry all the parts. Make sure all the parts are completely dry. Do not proceed to the next step until all the parts are completely dry, as this will prevent bacteria from growing.
Step 4: Reassemble and test the automatic pet dispenser. Attach the rotating blade that mixes the food to the body of the machine. Lock the food storage bucket. Check the condition of the desiccant. Replace the desiccant with a new one or continue to use the original one. Install the stainless steel feeding bowl and battery back into its original position. Check if the parts of the automatic cat dog feeder are loose or damaged. Finally, plug in to reset the program of your pet smart feeder. Check that all the functions of the feeder are working properly.

With the four steps above, the automatic cat dog feeder completes the cleaning. Regular cleaning of the automatic cat dog feeder is very important to prevent pet food residue and bacteria growth. Providing a clean and hygienic feeding environment is beneficial to your pet's healthy growth. Failure to clean the pet feeder for a long period of time may result in spoilage of pet food. Pets that consume spoiled pet food can cause diarrhea and many other health problems. Therefore, it is recommended that automatic cat dog feeder be cleaned regularly.


